Reference Readings - Preparing a External Hard Disk for Backup
Hard Disk Partitioning and Formatting
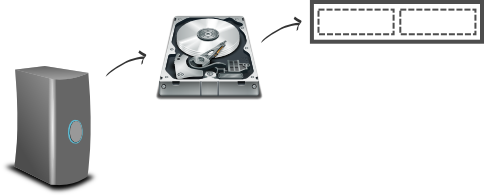
A physical hard disk is normally partition into one or multiple logical partitions. For example, one hard disk could be divided into 2 or 3 (or more) logical partitions as illustrate in the image below.
Furthermore, each partition is formatted as a file system type. There are many different file systems. The windows operating system typically runs on a NTFS file system, small USB Stick are typically formatted as FAT file system, the Linux operating systems can run on many types of file systems such as EXT3, EXT4, XFS and others. For example, a hard disk could be organised into 2 partitions, 1 NTFS partition to store data from Windows computer and 1 EXT4 partition to store data from a Linux server, this is illustrated below with the NTFS partition in brown and EXT4 partition in orange.

You are free to partition the hard disks like you want, but for this learning exercise we will do three examples: one on a Linux computer from the command line, another one from a Linux computer with a graphical user interface and one from a Windows computer. The first two on Linux will be logically organised like the illustration below to the left (i.e. EXT4 single partition shown in orange here) and the one on Windows will is shown below to the right (i.e. NTFS single partition shown in green). All three examples start from a newly purchase disk typically with already a single partition on them. Note the colors are just randomly assigned here for identification purposes, they could be different colors or no colors at all depending on what tool you are using to partition your hard disks.

One final concept to discuss is labeling. When partitioning and formatting a hard disk it is possible to assign a label (i.e. an identifying name) to it. This is useful as the hard disk partitions when being used on the computer will be clearly identified.
Before
proceeding it is important to understand that this is a relatively
advanced operation for new computer users and mistakes could destroy all
data on your computer. It is important to be guided by people with
experience and to do this work on a computer with no important
documents. The hard disk to format should also not contain anything of
importance such as a newly purchased external hard disk.
Preparing Backup Hard Disk on Linux Command Line
This process is considered advanced and requires guidance from someone with basic Linux knowledge and skills
From any Linux computer open the command line (also known as the terminal or console), it can easily be found from the application menu. Change has user root if not already.
$ su
If you are running a Linux computer with a full graphical desktop (like Windows) then the external disk will automatically be mounted (i.e. connected to the running computer) and ready to use when you plug it. You will have to unmount it (i.e. safely remove or disconnect it). Doing this from the command line can be done in two steps. Identify the disk with the following command to display all mounted partitions:
# mount
sysfs on /sys type sysfs (rw,nosuid,nodev,noexec,relatime)
proc on /proc type proc (rw,nosuid,nodev,noexec,relatime)
udev on /dev type devtmpfs (rw,relatime,size=10240k,nr_inodes=1005183,mode=755)
devpts on /dev/pts type devpts (rw,nosuid,noexec,relatime,gid=5,mode=620,ptmxmode=000)
tmpfs on /run type tmpfs (rw,nosuid,noexec,relatime,size=806452k,mode=755)
/dev/sda1 on / type ext3 (rw,relatime,errors=remount-ro,user_xattr,acl,barrier=0,data=ordered)
/dev/sdb1 on /media/usb1 type ext4 (rw,nodev,noexec,noatime,nodiratime,sync,barrier=1,data=ordered)
To identifying the connected hard disk look for the /media/ as shown above in bold. Note it may not be /media/usb1 like above but something else like /media/Mass Storage or /media/Western Digital. That's where the external hard disk is mounted. The second step is to unmount it with the following command:
# umount /media/usb1
The only tricky part is if you have spaces in the directory name such as in /media/Mass Storage. then you would need to proceed the space with a "\" like this:
# umount /media/Mass\ Storage
Once successfully unmounted it is ready to be formatted. The way to format for a UAP Gateway backup is like this with the label for the partition being a really important detail. Also the value of /dev/sdb1 is extremely important. Choosing the wrong value for this device name would result in destroying everything on another device which could be the hard disk of the computer you are using. The value /dev/sdb1 should be the same as the one umounted above in bold.
# mkfs.ext4 -L uap-backups /dev/sdb1
Once this completes the backup hard disk is prepared and ready to be used to backup any UAP Gateway. It can be pulled out of the computer safely.
Preparing Backup Hard Disk on Linux Graphical Interface
First install Gparted, a really feature rich tool to partition hard disks. It is available on most Linux systems can can be downloaded directly from the software package management or on the command line. For example, on Debian based systems (e.g. Ubuntu, Linux Mint, etc.) you can simply do:
$ sudo aptitude install gparted
And then start gparted from the application menu. It will ask for the root password and then display the first hard disk which is likely the hard disk of your computer (most often shown as sda on on the illustration below) so do not make any changes on that one.
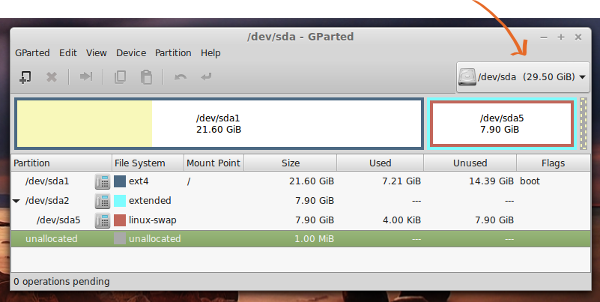
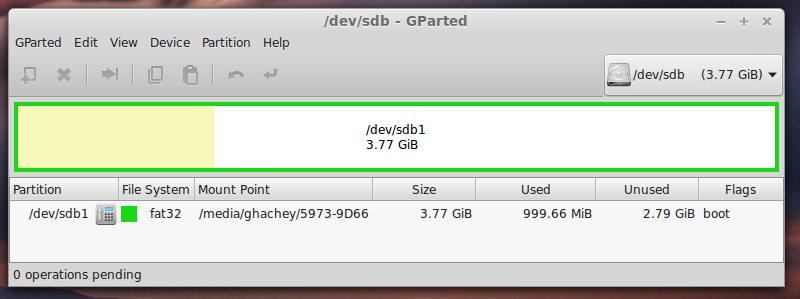
Make sure you only have a single external hard disk plugged in the computer and click on the /dev/sda from above figure with orange array to select the other disk, it should be your external disk. A newly bought external disk might look like the following with a single FAT partition (but it could be different).
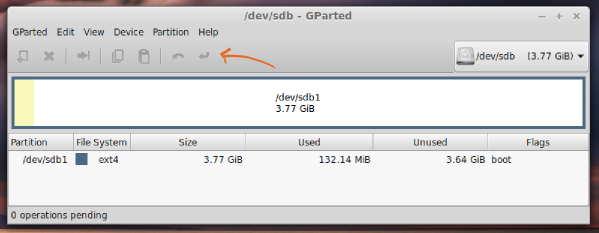
You must first make sure it is unmount which you can do from the top menu item Partition -> Umount has indicate in orange arrow below. From the same menu item you can format as EXT4 partition, Partition -> Format -> Ext4. You should see something similar to the following figure but you must click on apply to execute the operation; the apply button is identified below with orange arrow.
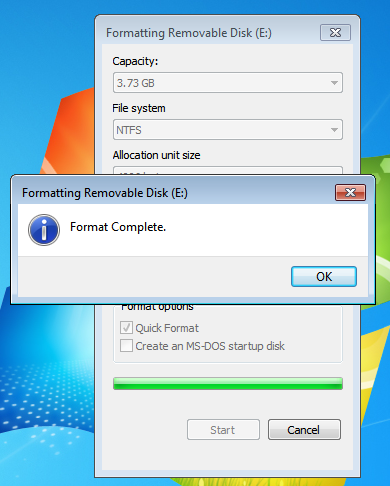
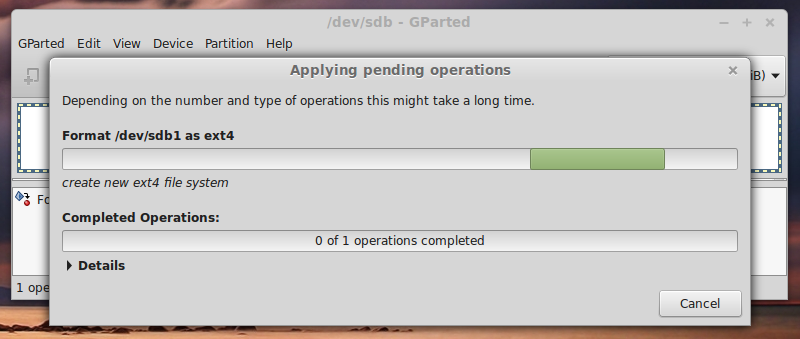
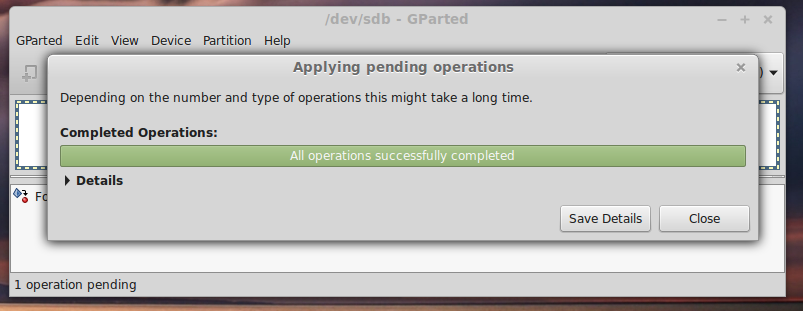
When Applying the changes you will see something like the following two figures, simply wait without interrupting.
The final important step is to label the partition which can also be done from top menu Partition -> Label. Enter the label uap-backups exactly has it is without a mistake otherwise backup will fail. You will also need to apply your changes like in the previous step to execute the operation. It should then look like the following figure with a new label as shown with the orange arrow.
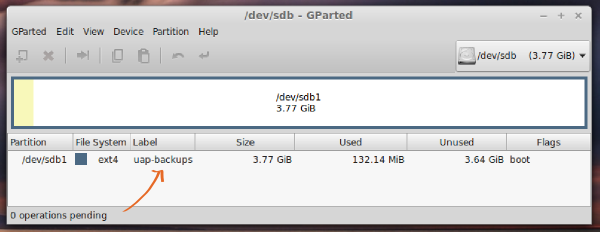
This disk is ready to store backups of your UAP Gateway.
Preparing Backup Hard Disk on Windows
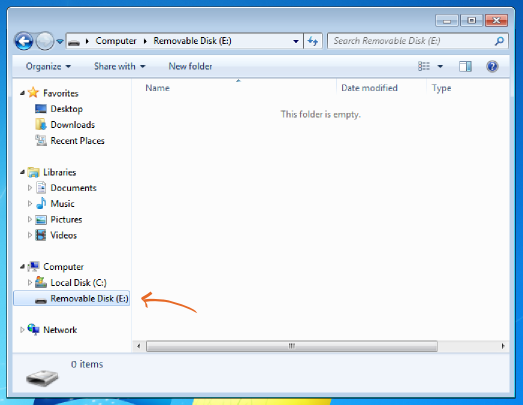
On Windows the partitioning and formatting tool is not as flexible and feature rich but it is easy to format a partition as NTFS which is all that is needed in this case. From the Windows start menu you can click on Computer to open a file browser. After inserting a new USB external drive you should see it listed as additional drive (e.g. Removable Disk (E:)) as shown in illustration below.
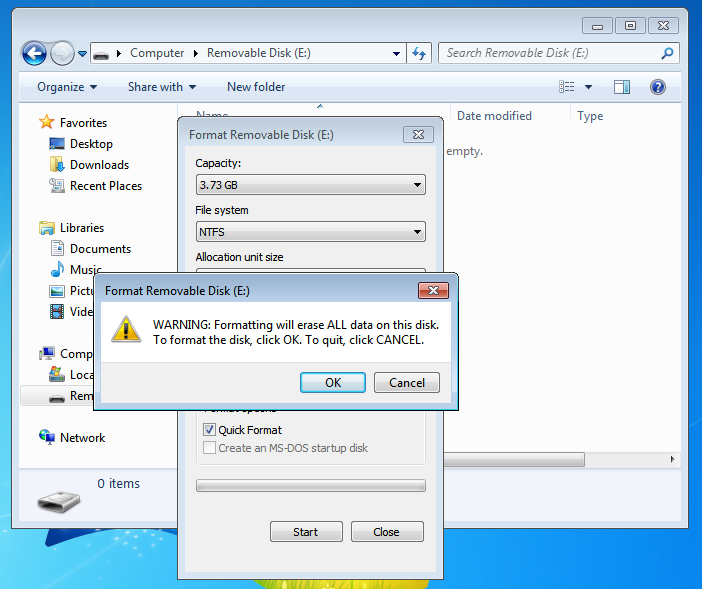
You can right click on Removable Disk (E:) (it may be slightly different on your machine) and click Format. You should see something like the following image. Make sure you select NTFS as file system type and enter the label uap-backups as shown by the orange arrows.
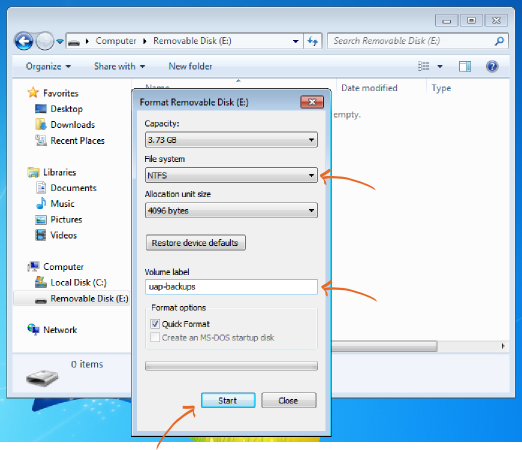
After pressing Start you should get a warning similar to the one shown below.